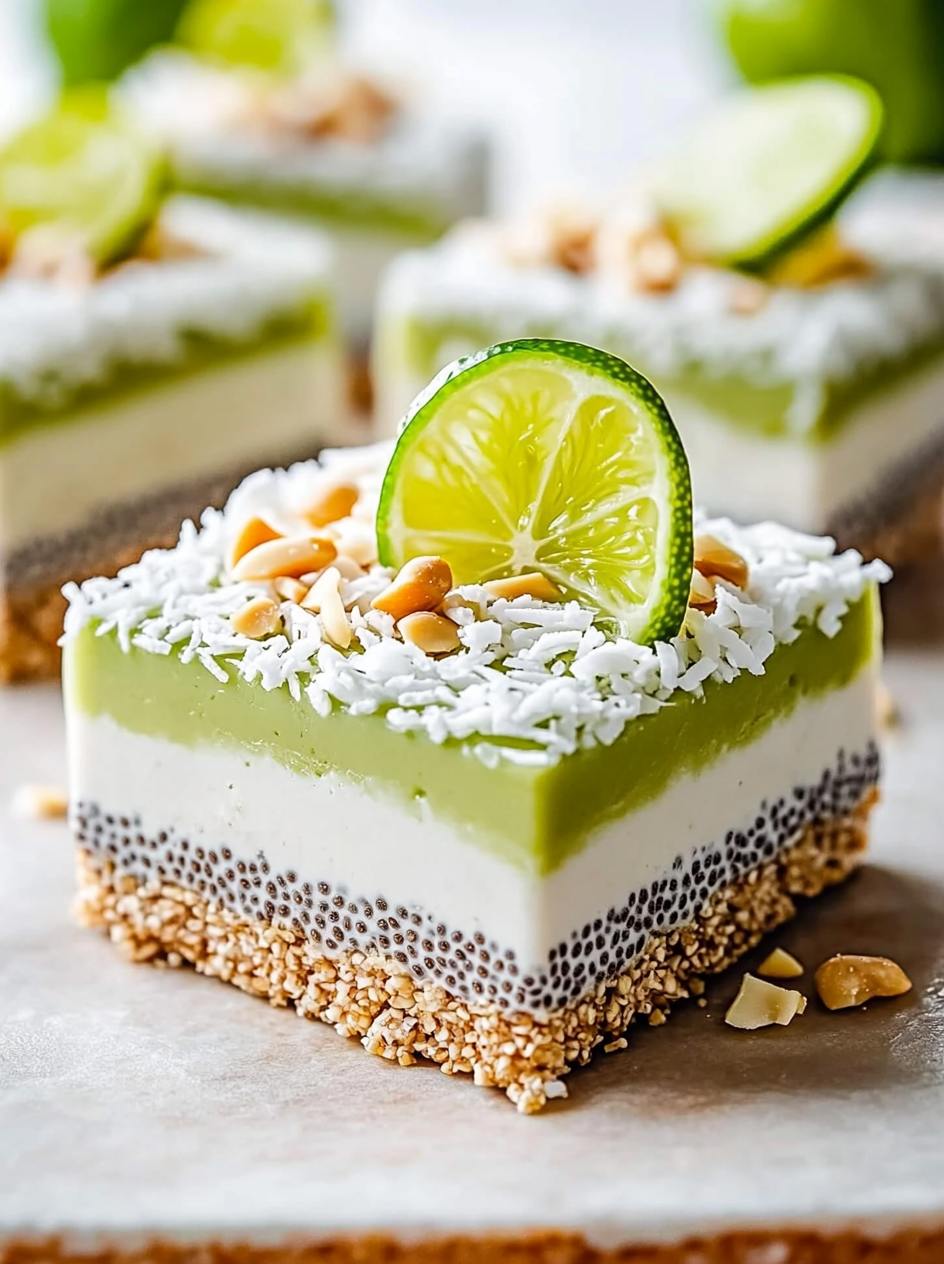
When the sun is shining and warm weather is upon us, there’s nothing quite like a refreshing treat to cool you down. Enter the Refreshing No-Bake Chia Pudding Bars with Zesty Coconut Lime Flavor. These delightful bars capture the essence of summer in every bite, combining the creamy richness of coconut milk with the zesty brightness of limes. Perfectly balanced, they are not only incredibly delicious but also packed with nutrient-dense chia seeds that offer a wealth of health benefits. With minimal effort and no baking required, they are the ideal dessert for hot days or a quick snack any time of the year.
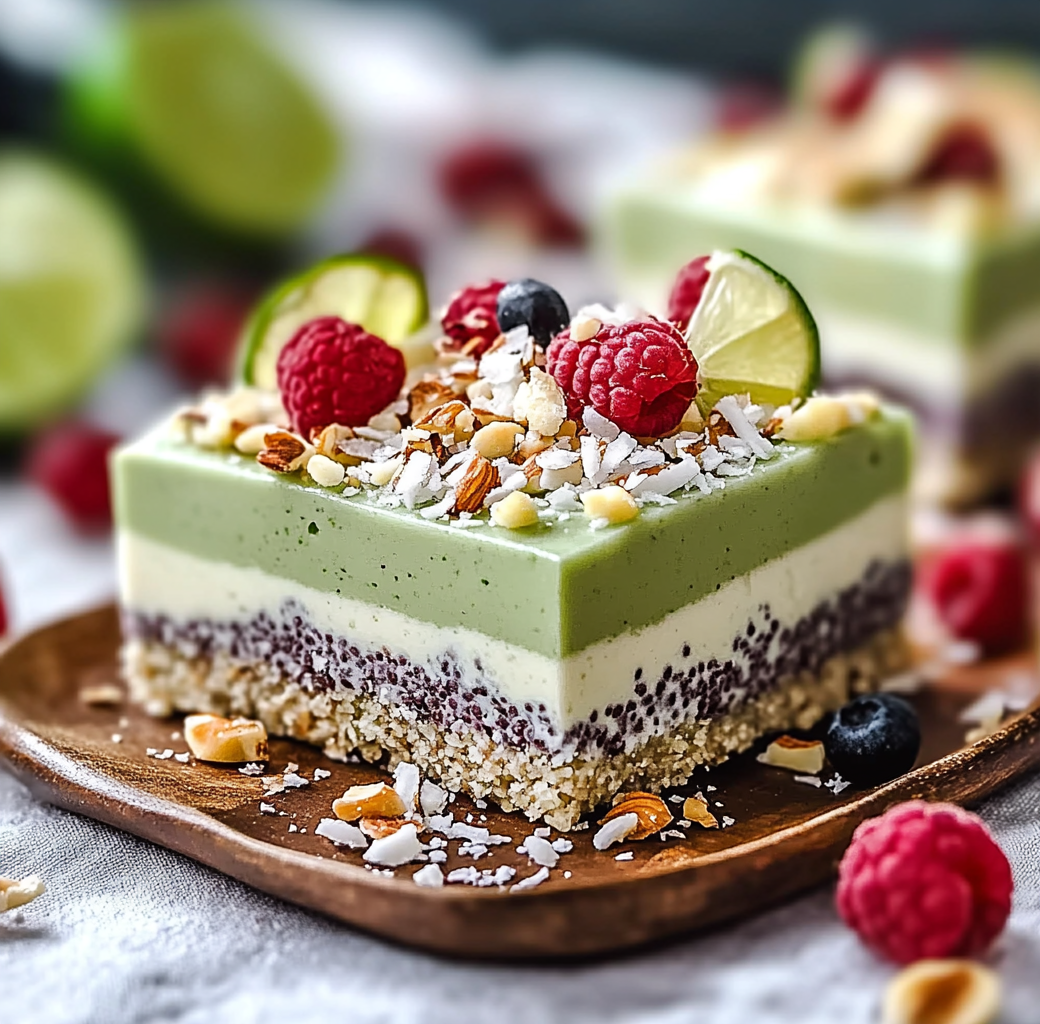
What’s more, these chia pudding bars are incredibly versatile. You can customize them with your favorite toppings, whether it’s a sprinkle of shredded coconut, a burst of fresh berries, or a handful of nuts for added crunch. The process is straightforward; just mix, refrigerate, and freeze. Plus, you can feel good about enjoying a treat that is dairy-free and refined sugar-free, making it suitable for various dietary preferences. So grab your blending tools, and let’s make these delicious no-bake chia pudding bars!
Why You’ll Love This Refreshing No-Bake Chia Pudding Bars
- Quick and Easy: These bars require no baking, making them a convenient option for any day.
- Healthy Ingredients: Packed with chia seeds, coconut milk, and natural sweeteners like maple syrup.
- Low-Calorie Treat: A guilt-free dessert that satisfies your sweet tooth without the extra calories.
- Customizable: Easily adapt the recipe with your choice of toppings for a perfect treat.
- Perfect for Any Occasion: Whether it’s a summer barbecue, a picnic, or simply for snacking at home, they fit right in.
Preparation Phase & Tools to Use
Before diving into the making of these delicious chia pudding bars, it’s essential to set up your kitchen efficiently. Start by gathering all your ingredients: chia seeds, full-fat coconut milk, maple syrup or agave nectar, and the zesty lime. Having everything within arm’s reach will streamline your process and make the cooking experience more enjoyable.
For the tools, you will need a large mixing bowl for whisking your ingredients together and a whisk for even mixing. A measuring cup will help with the accurate measurement of liquids, while a spatula will assist in smoothing out the mixture later on. Finally, don’t forget to line your 8×8 inch pan with parchment paper as this will make transferring the bars out of the pan much easier once they’re set. Having your workspace neat and organized can help in achieving the best results!
Ingredients
- 1/2 cup (80g) chia seeds
- 1 can (400ml) full-fat coconut milk
- 1/4 cup (60ml) maple syrup or agave nectar
- Juice of 1 large lime (2–3 tbsp / 30–45ml)
- Zest of 1 large lime
- 1 teaspoon vanilla extract
- Pinch of salt
Instructions
Step 1: Mix the Base Ingredients
In a large mixing bowl, start by whisking together the rich coconut milk, maple syrup (or agave), vanilla extract, and the fresh lime juice until smoothly combined. This blend not just adds flavor but also a creamy texture that makes the pudding bars incredibly satisfying. The addition of salt enhances the overall taste and balances the sweetness.
Step 2: Incorporate Chia Seeds
Once your base ingredients are blended well, slowly incorporate the chia seeds while continuously whisking. This is important; the chia seeds will absorb moisture and swell up, giving the bars their signature pudding-like consistency. Don’t forget to stir in the lime zest, which adds a zesty flair and enhances the overall flavor.
Step 3: Rest and Refrigerate
Allow the mixture to sit at room temperature for about 10 minutes; this is crucial as it lets the chia seeds begin to absorb the liquid. After the resting period, whisk the mixture again to ensure that the chia seeds are evenly distributed and not clumping together. Then, cover the bowl and place it in the refrigerator to set for at least four hours or overnight if you can wait!
Step 4: Prepare for Freezing
Once the chia pudding is set and thickened, it’s time to get ready to make bars! Line an 8×8 inch pan with parchment paper, allowing some overhang on the edges; this will make removing the bars easier later. Stir the chilled pudding one final time before pouring it into the lined pan. Use a spatula to smooth the top for even bars. If you wish to add toppings, this is the time to sprinkle them on top!
Step 5: Freeze and Serve
Now, place the pan in the freezer for 2 to 3 hours until the bars are firm. Once frozen, you can lift the chia pudding out of the pan using the parchment paper edges. Cut it into squares, bars, or cubes as per your preference. These luscious pudding bars can be enjoyed straight from the freezer for an exceptionally cool, satisfying treat!
Variations
- Protein: Boost your bars with protein powder mixed into the base for added nutrition.
- Vegetables: Consider adding spinach or kale to the mixture for an extra nutritional boost.
- Spices: Experiment with spices such as cinnamon or nutmeg to refine the flavors further.
Cooking Notes
- Make sure to use full-fat coconut milk for a creamy texture.
- Allow enough time for the chia pudding to thicken in the fridge.
Serving Suggestions
- Serve topped with fresh fruits like berries or mango for a refreshing finish.
- Drizzle with more maple syrup or agave nectar for additional sweetness if desired.
Tips
- For a tropical twist, add diced pineapple along with the other toppings.
- Store bars in the freezer, but remember to let them thaw slightly before serving for easier cutting and eating.
Prep Time, Cook Time, Total Time
- Prep Time: 15 minutes
- Cook Time: 0 minutes (no baking)
- Total Time: 4 hours 15 minutes (including chilling)
Nutritional Information
- Calories: Approximately 180 per bar (varies with toppings)
- Protein: 3g
- Sodium: 30mg
FAQs
How long can I store the chia pudding bars?
You can keep these bars in the freezer for up to a month. Just ensure they are well-wrapped to avoid freezer burn.
Can I use other types of milk?
Yes! Almond milk or cashew milk could be used if you want to switch things up.
Can I make these bars vegan?
Absolutely! The recipe is already vegan-friendly as it uses maple syrup and coconut milk.
Can I omit the sweetener?
While you can reduce the amount of sweetener, keep in mind that it helps to balance the tartness of the lime.
Conclusion
These Refreshing No-Bake Chia Pudding Bars with Zesty Coconut Lime Flavor are not just a treat; they are a refreshing and nourishing snack you can feel good about enjoying. With their creamy texture, bright flavors, and endless customization possibilities, they are sure to satisfy your cravings all summer long. So, whether you’re making them for a gathering or just for yourself, these bars are easy to whip up and will undoubtedly impress everyone. Don’t forget to share your thoughts in the comments below or let us know how you decided to customize your bars!
Print
Refreshing No-Bake Chia Pudding Bars with Zesty Coconut Lime Flavor
- Total Time: 4 hours 15 minutes
- Yield: 12 bars 1x
Description
These Refreshing No-Bake Chia Pudding Bars capture the essence of summer and are perfect for a quick snack.
Ingredients
- 1/2 cup (80g) chia seeds
- 1 can (400ml) full-fat coconut milk
- 1/4 cup (60ml) maple syrup or agave nectar
- Juice of 1 large lime (2–3 tbsp / 30–45ml)
- Zest of 1 large lime
- 1 teaspoon vanilla extract
- Pinch of salt
Instructions
- In a large mixing bowl, whisk together the coconut milk, maple syrup, vanilla extract, and lime juice until smoothly combined.
- Slowly incorporate the chia seeds while continuously whisking.
- Allow the mixture to sit at room temperature for about 10 minutes, then whisk it again and refrigerate for at least four hours or overnight.
- Line an 8×8 inch pan with parchment paper, pour in the chilled pudding, and smooth the top.
- Freeze for 2 to 3 hours, then cut into bars.
Notes
Store bars in the freezer for up to a month, wrapped well to avoid freezer burn.
- Prep Time: 15 minutes
- Cook Time: 0 minutes
- Category: Dessert
Nutrition
- Calories: approximately 180 per bar
- Sodium: 30 mg
- Protein: 3 g