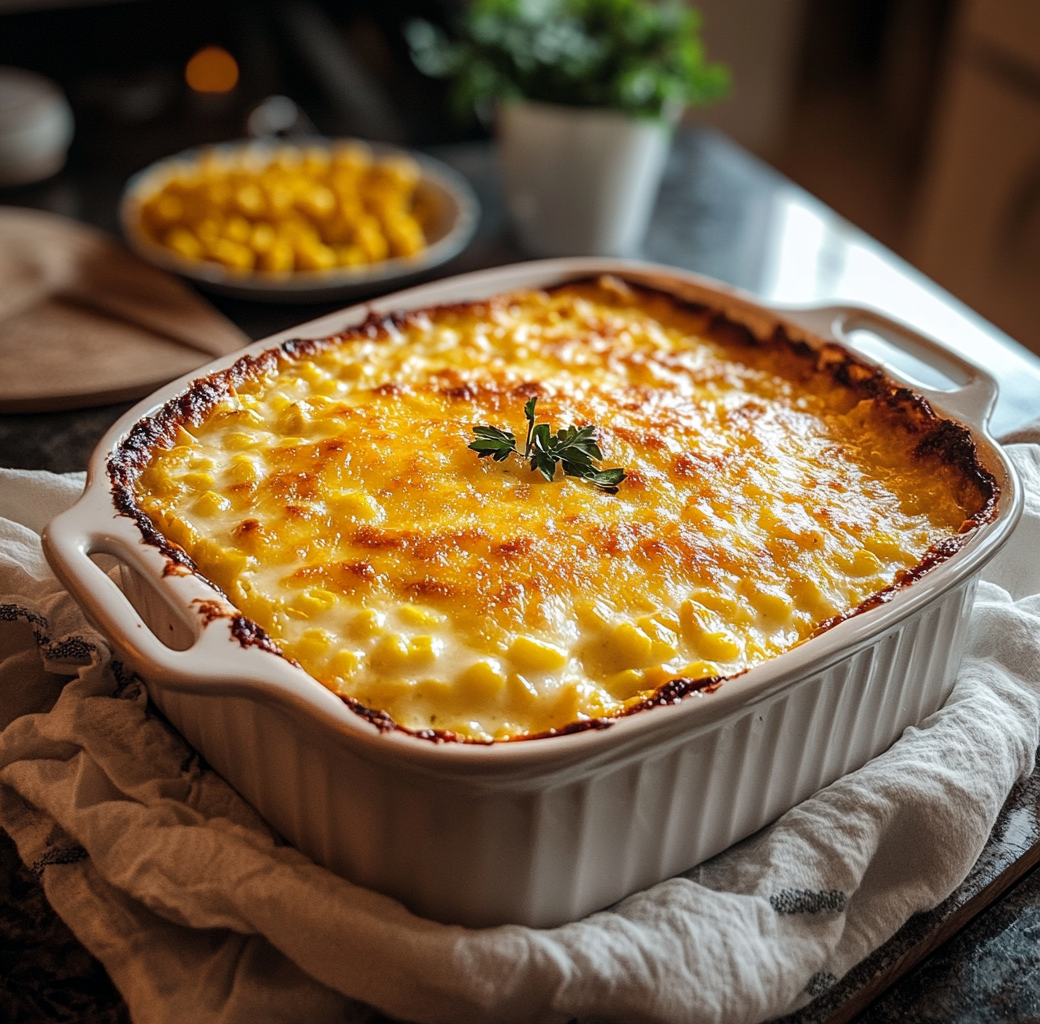
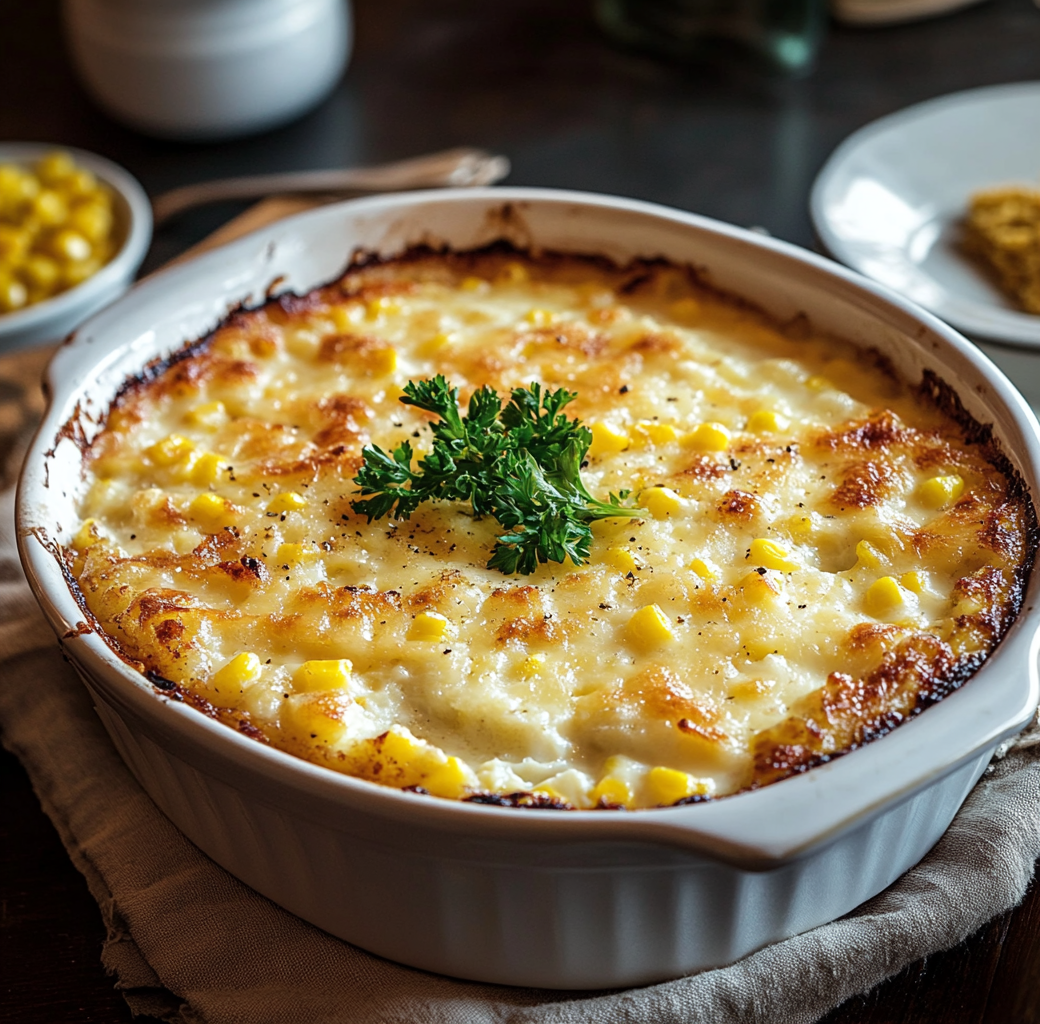
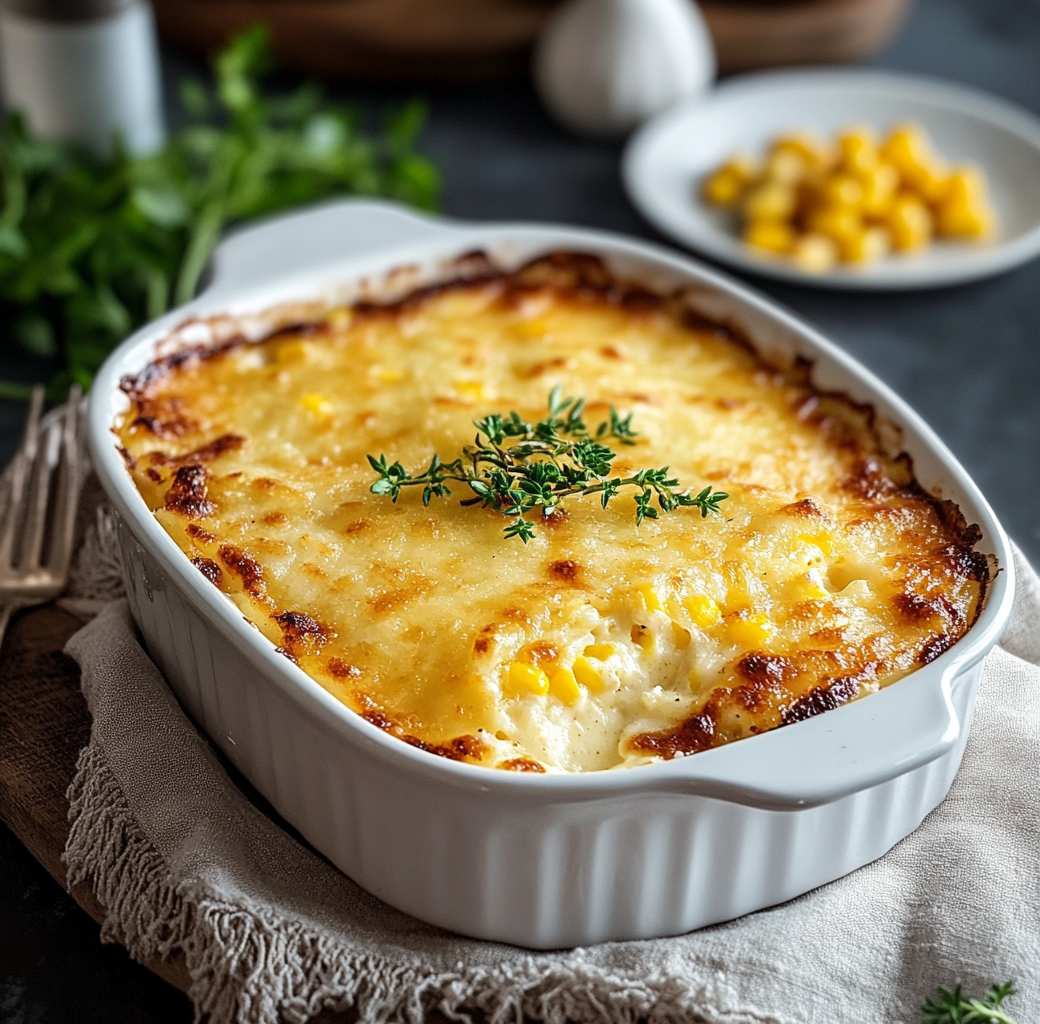
Transform your dining table into a sophisticated steakhouse experience with our delicious Ruth’s Chris Corn Pudding Recipe! This dish embodies richness and comfort through its smooth, creamy texture and subtle sweetness. It’s perfect for family gatherings, dinner parties, or as a comforting side dish that you can whip up easily. The blend of flavors and textures is simply irresistible, making it a favorite among corn lovers and those who appreciate indulgent, home-cooked meals. Plus, with simple ingredients and straightforward instructions, you can serve a slice of luxury during any meal!
As you dive into this delightful recipe, picture the soft, fluffy pudding melting in your mouth, and the warm buttery aroma filling your kitchen. You can serve this corn pudding warm as a delicious complement to any main dish, be it grilled meats or roasted vegetables. Let’s explore how easy it is to bring a taste of luxury to your own table!
Why You’ll Love This Ruth’s Chris Corn Pudding Recipe
- Indulgent Flavor: The combination of sweet corn, creamy texture, and a hint of butter creates a flavor that captivates your taste buds.
- Simple Preparation: With just a handful of ingredients and straightforward steps, this recipe is ideal for cooks of all skill levels.
- Perfect for Any Occasion: Whether it’s a holiday feast or a casual weeknight meal, this corn pudding fits right in!
- Comfort Food Classic: This pudding evokes warm memories of family meals and celebration, making it that much more special.
Preparation Phase & Tools to Use
Before diving into creating your Ruth’s Chris Corn Pudding, it’s essential to set up your kitchen for success. Start by gathering all your ingredients to ensure you have everything you need within reach. Preheat your oven to 350°F, as this ensures a perfectly baked side dish with an irresistible golden crust.
Next, prepare your baking dish; a 9×13-inch dish works best for this recipe. Greasing it with a bit of butter will help in easy release after baking. It’s also a good idea to have mixing bowls ready, one for your dry ingredients and another for your wet ingredients, as this will streamline the process and make it less messy.
Ingredients
- 1 box (8.5 oz) corn muffin mix
- 1 cup sour cream
- 2 cans (15 oz each) whole kernel corn, drained
- 2 large eggs
- 1/2 cup butter, melted
- 1/4 cup sugar
- 1/2 teaspoon salt
- 1 can (14.75 oz) creamed corn
Instructions
Step 1: Preheat and Prepare Your Dish
Start by preheating your oven to 350°F (175°C). This ensures that your Corn Pudding bakes at the right temperature, resulting in a delightful, fluffy texture. Next, take the 9×13-inch baking dish and grease it thoroughly with butter. This step is crucial as it will prevent the pudding from sticking, allowing for easy serving!
Step 2: Mix the Corn
In a large mixing bowl, combine the drained whole kernel corn and the creamed corn. This mixture serves as the base of your pudding, providing that creamy texture and sweet corn flavor. Stir them together until they are well blended, ensuring even distribution of the two types of corn—this step is essential for achieving a uniform taste.
Step 3: Combine Dry Ingredients
Now it’s time to add the corn muffin mix into the bowl of corn. Stir it gently, making sure the mix is fully incorporated into the corn mixture. This will create the fluffy structure of your pudding once baked. Keep an eye on the mixture; you want to blend until just combined to maintain the moisture.
Step 4: Prepare the Wet Mixture
In a separate bowl, beat the eggs until they are fluffy. The fluffiness of the eggs will help create a lighter texture in the pudding. In another bowl, mix the sour cream and melted butter together, then add the sugar and salt. Stir this mixture until it is smooth—this combination adds richness and a hint of sweetness to the overall flavor profile.
Step 5: Combine Everything
Now, gently fold the wet mixture into the corn mixture. The goal here is to unify all the components without over-mixing. The beauty of this recipe lies in its simplicity, so don’t worry if you see some lumps; they will blend well as it bakes. Once everything appears just combined, it’s time to transfer your mixture into the prepared baking dish.
Step 6: Bake to Perfection
Pour the combined mixture into the greased baking dish, spreading it evenly across the surface. Slide it into your preheated oven and bake for about 45 to 50 minutes. When done, the top should turn golden brown, and it should be set in the center. After baking, let it cool for about 10 minutes to firm up before slicing.
Variations
- Protein: Add cooked, crumbled bacon or diced ham for a meaty twist.
- Vegetables: For extra nutrition, incorporate diced bell peppers or green onions.
- Spices: Spice it up with jalapeños for heat or garlic powder for an aromatic touch.
Cooking Notes
- Allow the corn pudding to sit for a few minutes after baking for easier slicing.
- You can use frozen corn instead of canned; just ensure it’s thawed and drained.
Serving Suggestions
- Pair this corn pudding with grilled steak or roasted chicken for a perfect meal.
- Serve alongside a fresh salad for a lighter option.
Tips
- If you have leftovers, store them in an airtight container in the fridge for up to 3 days.
- Reheat in the oven or microwave, adding a splash of cream if it seems dry.
Prep Time, Cook Time, Total Time
- Prep Time: 15 minutes
- Cook Time: 50 minutes
- Total Time: 1 hour 5 minutes
Nutritional Information
- Calories: Approximately 250 per serving
- Protein: 4g
- Sodium: 500mg
FAQs
Can I make this recipe ahead of time?
Absolutely! You can prepare your corn pudding mixture ahead of time and store it in the fridge. Just bake it when you’re ready to serve!
Can I freeze corn pudding?
Yes, corn pudding freezes well. Just make sure it’s cooled completely before wrapping and storing in an airtight container for up to 2 months.
What should I serve corn pudding with?
It pairs wonderfully with main dishes like roasted chicken, grilled steaks, or even alongside a hearty chili.
How can I make it spicier?
For a kick, add chopped jalapeños or cayenne pepper to the batter; adjust according to taste!
Conclusion
In conclusion, this Ruth’s Chris Corn Pudding Recipe is more than just a side dish; it’s a delightfully creamy, comforting addition to your meal that can elevate even the simplest of gatherings. Its easy preparation makes it accessible for anyone looking to impress guests or indulge in a warm family meal. Don’t forget to experiment with your own variations and personal touches, making this recipe uniquely yours. Ready to indulge? Try it out, share your thoughts in the comments below, and let us know how you made it your own!
Print
Ruth’s Chris Corn Pudding
- Total Time: 1 hour 5 minutes
- Yield: 8 servings 1x
Description
Transform your dining table into a sophisticated steakhouse experience with this delicious, creamy corn pudding!
Ingredients
- 1 box (8.5 oz) corn muffin mix
- 1 cup sour cream
- 2 cans (15 oz each) whole kernel corn, drained
- 2 large eggs
- 1/2 cup butter, melted
- 1/4 cup sugar
- 1/2 teaspoon salt
- 1 can (14.75 oz) creamed corn
Instructions
- Preheat your oven to 350°F (175°C) and grease a 9×13-inch baking dish.
- In a large bowl, combine the drained whole kernel corn and creamed corn.
- Mix in the corn muffin mix until just combined.
- In another bowl, beat the eggs, then mix in sour cream, melted butter, sugar, and salt.
- Fold the wet mixture into the corn mixture until just combined.
- Transfer to the greased baking dish and bake for 45 to 50 minutes.
Notes
Let the corn pudding cool for about 10 minutes before slicing.
- Prep Time: 15 minutes
- Cook Time: 50 minutes
- Category: Side Dish
Nutrition
- Calories: 250 kcal
- Sodium: 500 mg
- Protein: 4 g